%22%20fill%3D%22%23498AC7%22%2F%3E%0A%3Cg%20clip-path%3D%22url(%23clip0_14993_5160)%22%3E%0A%3Cpath%20d%3D%22M426.51%20180.638L412.599%20179.279L417.745%20126.608L431.274%20127.93L426.51%20180.638Z%22%20fill%3D%22white%22%2F%3E%0A%3Cpath%20d%3D%22M473.93%20185.447L460.019%20184.088L465.301%20130.026L478.829%20131.347L473.93%20185.447Z%22%20fill%3D%22white%22%2F%3E%0A%3Cpath%20d%3D%22M493.649%20187.373L479.721%20186.012L485.002%20131.95L498.531%20133.272L493.649%20187.373Z%22%20fill%3D%22white%22%2F%3E%0A%3Cpath%20d%3D%22M431.901%20146.126L447.142%20128.48L462.705%20130L442.263%20155.599L455.974%20184.166L438.776%20182.486L430.265%20162.871L431.901%20146.126Z%22%20fill%3D%22white%22%2F%3E%0A%3Cpath%20d%3D%22M539.689%20154.918C539.689%20154.918%20539.708%20154.727%20539.716%20154.64C539.84%20152.651%20542.627%20150.904%20545.568%20150.261L546.876%20136.872C537.245%20137.353%20528.138%20143.239%20527.142%20153.429C527.091%20153.951%20527.058%20154.474%20527.061%20154.984C527.224%20157.264%20527.695%20160.172%20528.81%20162.773C529.727%20164.882%20531.07%20166.768%20533.06%20167.963C537.804%20170.797%20541.084%20171.363%20543.491%20171.528L544.827%20159.107C541.508%20158.396%20539.748%20157.013%20539.706%20154.92L539.689%20154.918Z%22%20fill%3D%22white%22%2F%3E%0A%3Cpath%20d%3D%22M551.606%20176.868C551.606%20176.868%20551.587%20177.059%20551.579%20177.146C551.455%20179.135%20548.625%20180.07%20545.683%20180.713L544.375%20194.102C554.007%20193.621%20563.159%20188.529%20564.154%20178.339C564.205%20177.818%20564.239%20177.294%20564.236%20176.785C564.073%20174.504%20563.602%20171.597%20562.487%20168.995C561.569%20166.887%20560.226%20165%20558.236%20163.805C553.492%20160.972%20550.092%20160.376%20547.684%20160.229L546.549%20171.844C549.868%20172.555%20551.547%20174.773%20551.589%20176.866L551.606%20176.868Z%22%20fill%3D%22white%22%2F%3E%0A%3Cpath%20d%3D%22M555.54%20157.45L567.714%20157.358C568.837%20145.864%20560.311%20137.904%20548.834%20136.782L549.982%20136.894L548.697%20150.04C552.925%20150.436%20555.314%20152.39%20555.54%20157.45Z%22%20fill%3D%22white%22%2F%3E%0A%3Cpath%20d%3D%22M537.755%20173.46L525.58%20173.552C524.457%20185.046%20529.801%20192.696%20541.278%20193.817L542.566%20180.636C538.339%20180.241%20537.98%20178.521%20537.755%20173.46Z%22%20fill%3D%22white%22%2F%3E%0A%3Cpath%20d%3D%22M521.49%20180.017C521.434%20180.591%20521.294%20181.121%20521.052%20181.624C520.277%20186.868%20515.596%20189.5%20510.257%20188.978L496.346%20187.619L497.754%20173.204L506.327%20174.041C507.284%20174.135%20508.142%20173.429%20508.236%20172.472L510.288%20151.467C510.382%20150.51%20509.676%20149.651%20508.719%20149.558L500.164%20148.722L501.508%20133.528L515.402%20134.885C520.931%20135.426%20525.154%20139.999%20524.614%20145.528L524.074%20151.058L521.492%20179.999L521.49%20180.017Z%22%20fill%3D%22white%22%2F%3E%0A%3C%2Fg%3E%0A%3Cdefs%3E%0A%3CclipPath%20id%3D%22clip0_14993_5160%22%3E%0A%3Crect%20width%3D%22152.248%22%20height%3D%2257.4818%22%20fill%3D%22white%22%20transform%3D%22translate(418%20124)%20rotate(5.58)%22%2F%3E%0A%3C%2FclipPath%3E%0A%3C%2Fdefs%3E%0A%3C%2Fsvg%3E%0A)
The Sheets: 11 Steps to Build an Outdoor Rink in Your Backyard

You don’t have to be Wayne Gretzky to appreciate a good backyard ice rink. Anyone with a patch of land and a few days of freezing temperatures can build one!
Many hockey families construct great outdoor rinks—ODRs—with cool features for kids (and sometimes adults) to play on. This winter, I explored about a dozen backyard sheets around my community in New Hampshire. Each one is unique. It takes anywhere from three hours to three months to build an ODR. Costs range from a few hundred to a few thousand dollars depending on size and amenities.
Most folks in New England start building their rinks in November. Building any time after that risks frozen ground and heavy snowfall that will make installation difficult. November weather is usually nice to build in, and you can get friends to help you then. You will also not kill your grass because it will already be hibernating for the winter at that time.
Building an ODR is not as hard as you think. All you really need is boards, brackets, a liner, water, and your old hockey friend, winter. Also: do not try this on your own. Building a rink has to be a parent or adult-led project!
Step 1: Flat land
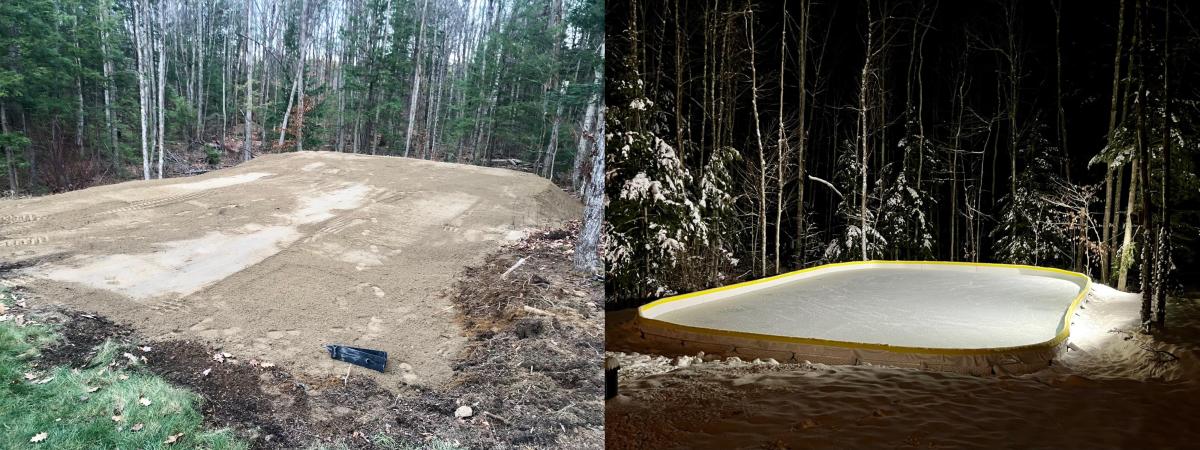
Find, or make, a flat area of land for your sheet. Uneven land forces the water to one side of the rink, and can put pressure on the downslope boards. Water is heavy and can blow out the boards.
You can measure the slope of the land with string tied to the same sized stakes on the four corners of your rink. Use a level to see if the string is slanted. If it is slanted, your rink is sloped and you need to find another place for your rink or find a way to fix the slope.
If you have sloped land, you can add fill to the land to make it even like the Lavallee family did in the above photos. Fill, then flatten.
Step 2: Size up your rink
Measure the length and width of the sheet you want. Stake out the four corners of the perimeter using the Pythagorean Theorem you learned in your geometry lessons. Once the math works, stake out the rest of the frame of the rink. Then lay out the boards you want to use and cut them to fit. You can use any boards you want. Plywood, two-by-fours, or even a commercial kit can frame your sheet.
Step 3: Clear the space
Clear the land of debris, including sticks and rocks that might puncture the liner that holds the ice. Do this before it snows, because it is more difficult and cold in the snow.
Step 4: Install the boards
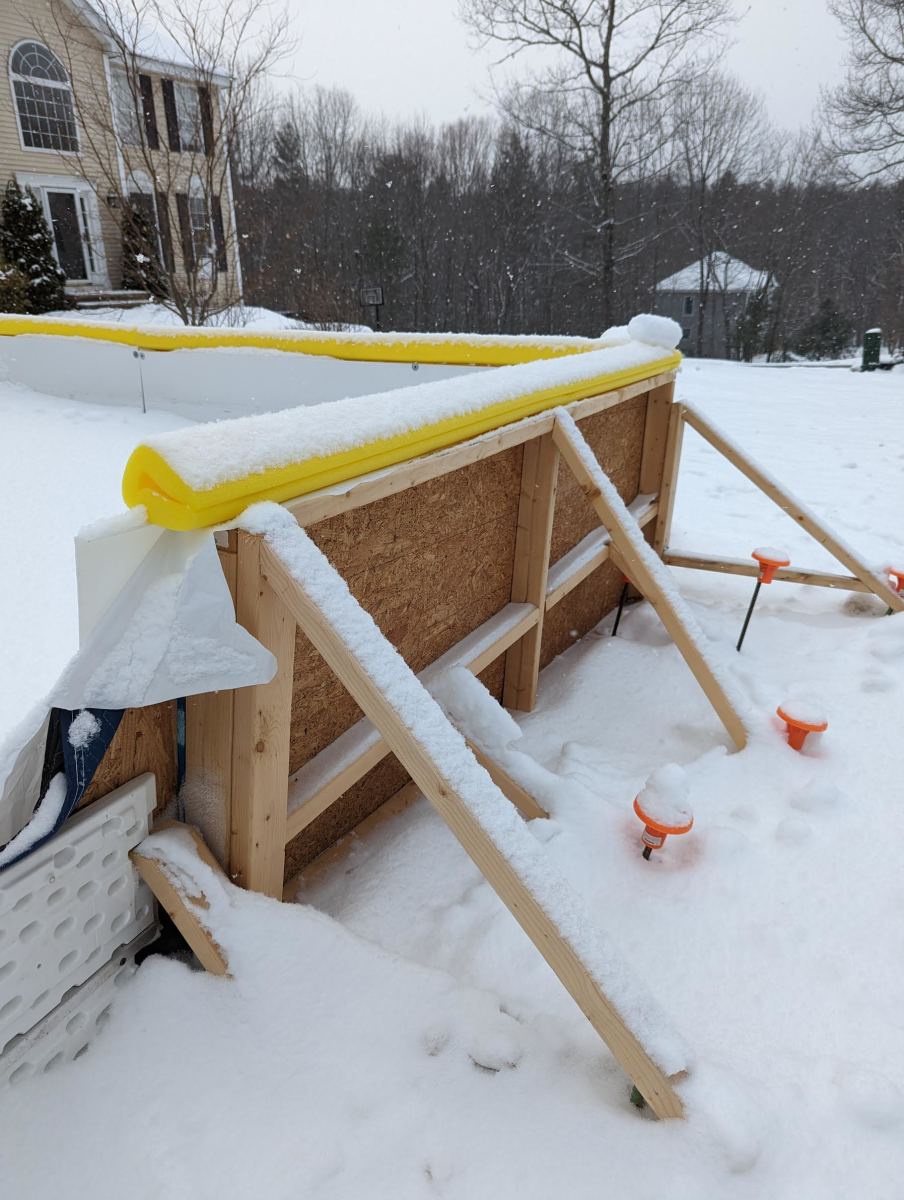
Use brackets of any kind to hold your boards together firmly. A bracket is just something strong that connects and holds two boards together. You can find brackets on Amazon or at a hardware store. Board and bracket the whole perimeter. Don’t worry how sketchy the boards look. They just need to hold the liner.
Step 5: Put down the liner
The liner is the most important part of the rink so make sure to get a good one that is big enough to cover more space than you need and strong enough to hold water.
Step 6: Flood it
Fill your rink with water at least four inches deep. You can get the water from a pool company, your own hose, your own pool. (Around here, Coach Russo takes water from his family pool! Coach Chris Riccio uses creek water.) It may take a couple of days to fill a rink by hose or creek.
Step 7: Wait
Watch the weather. Wait until you see a forecast for at least four days of freezing temperatures (below 32º Fahrenheit or 0 Celsius). It will take about four full days to freeze four inches of water. You need the water to freeze fully to safely skate on it, and so wildlife doesn’t walk across it and ruin the liner.
Step 8: Test
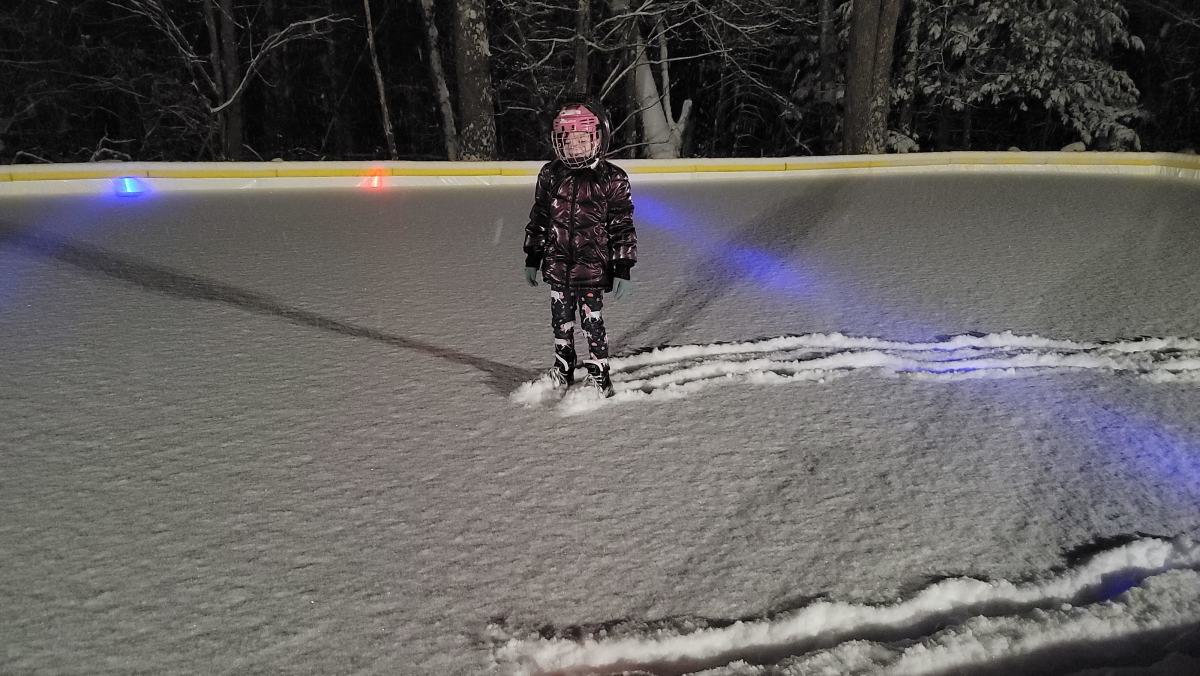
After the fourth day of freezing temperatures, drill a hole in the ice to measure at least four inches of depth. Then find the smallest skater you know, and send them out to test the ice to make sure it does not break.
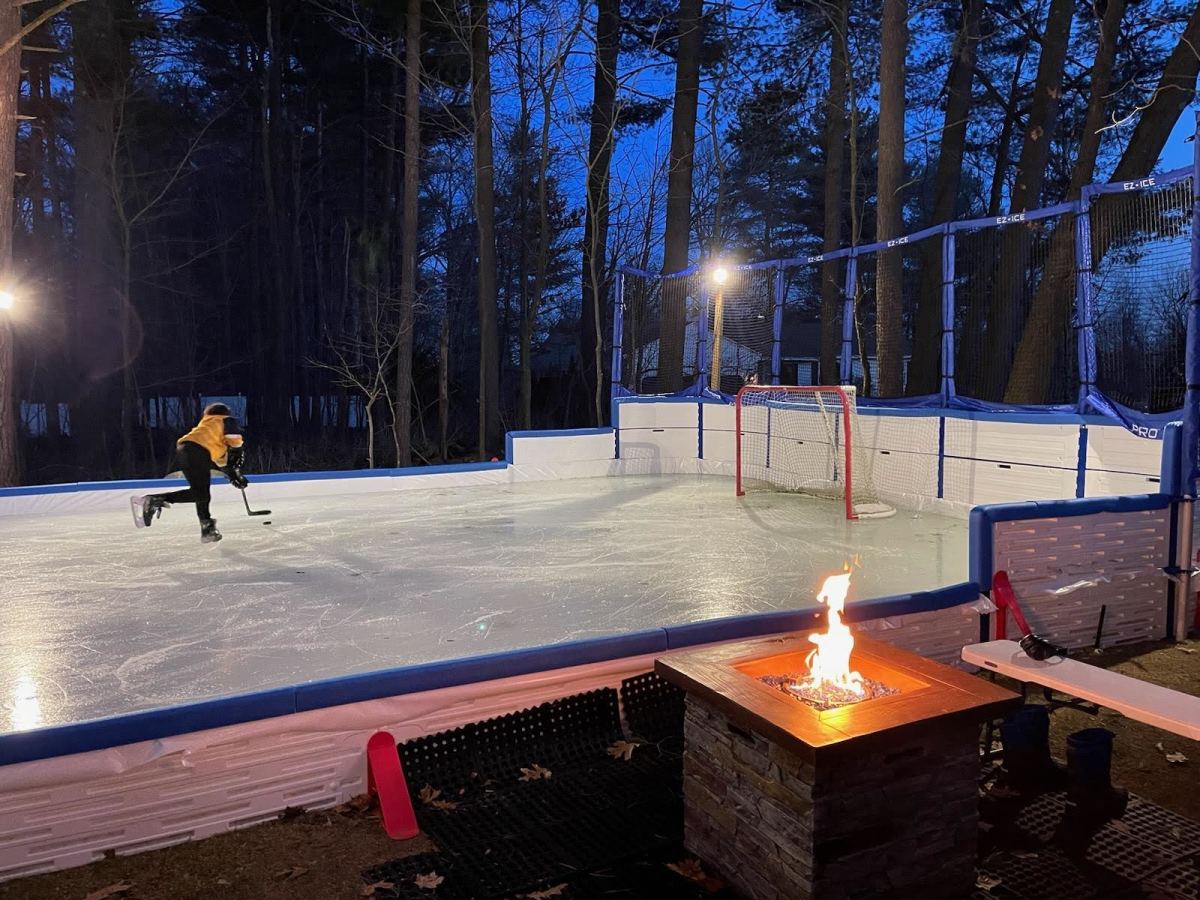
Step 9: Add your favorite features
For example, Coach Keith Duperron put up some awesome night lights at the four corners of his family rink. Coach Koziol also has a fire pit for s'mores and hanging out after playing.
Step 10: Maintain your rink.
If it snows, shovel it right away because one, you are decreasing your playing time, and two, the snow sticks to the ice and it will make it bumpy to skate on. If the sheet is bumpy, you can scrape it with a tool or flood it with small amounts of water to make it freeze smoothly again.
Step 11. Enjoy!
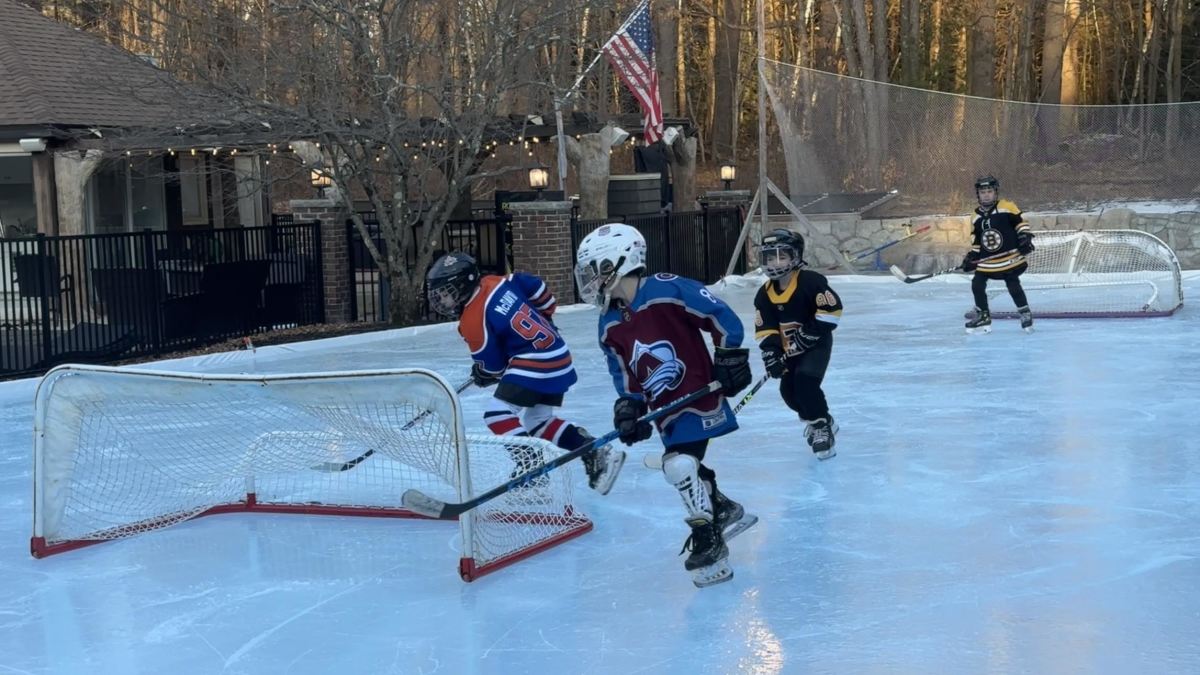
Have fun skating on your own private Gretzky berg!